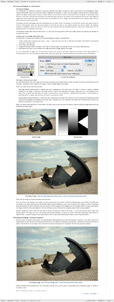
An introduction to the ‘Luminosity masking: part two’ tutorialThis is the second of a two part series of tutorials on luminosity masking, a powerful technique that you can use to selectively enhance your images. Unlike conventional masking techniques, which often require you to manually create a specific selection to mask an area of an image (and then feather, or otherwise alter the mask to blend the change with the remainder of the image), luminosity masking creates selections and masks that based solely on the brightness of the pixels themselves. As such, masks created using this technique often blend seamlessly with one another and the unchanged areas of the image, obviating the need to predetermine the selection area, or repair/refine the mask subsequent to its use. In this part of the series we will focus on luminosity painting: a technique that provides an even greater degree of fine scale control over the tonal balance of different areas of your images. Both parts were co-written with Tony Kuyper, a recognised authority in this field. The specific topics covered include:
This tutorial contains almost 6300 words, 28 illustrative images and screen grabs, and has received 5 comments. Content overview (the rollover graphics and embedded videos are not illustrated)
How to subscribe
Further information
To find out more about our other individual tutorials please click any of the following images. Alternatively, you can visit our main tutorials page for further information on: our annual subscriptions; our forthcoming issues; and our current members’s offers. You can also read through our sample tutorial on Tonal Range and the Curves tool.
David J. Nightingale © 2003–18 • all rights reserved
|
↓ David
↓ Libby
↓ Get the Latest News



software links
 Our annual subscribers and lifetime members can obtain a 15% discount on any of the Topaz Labs Photoshop plugins or plugin bundles.
 Our annual subscribers and lifetime members can obtain a 15% discount on Photomatix Pro.
training partners
| |||||||||||||||||||||||||||||||||||||||||||||||||||||||||||||||||||||||||||||||||||||||||||||||||||||||||||||||||||||||||||||||||||||||||||||||||||||||||||||
