HomeOnline tutorials17 comments 
Working with textures: part one (further information)

An introduction to the ‘Working with textures: part one’ tutorial

This is the first of a two-part tutorial on working with textures; i.e. combining and blending layers of texture to existing images. Unlike our previous, sole-authored tutorials, this short series is being prepared in conjunction with Michael Regnier, an internationally renowned artist in this field. Michael has produced work for a variety of clients, including Coca Cola, Kodak and the Federal Reserve Bank, and has been awarded numerous accolades for his work.

If you would like to see some examples of Michael’s work, you can do so here:

http://www.regnierphotography.com/

The specific topics covered include:

  • Using a variety of blend modes to merge a textured image with your photographs.
  • Choosing a texture that will match your creative intentions.
  • Applying a texture to create a number of different effects.
  • Using a texture to selectively replace a background.

This tutorial contains 7994 words, 70 illustrative images and screen grabs, and has received 17 comments.

Photoshop files included with this tutorial

Each of our tutorials is based around a series of Photoshop files containing all the original adjustment layers that were used to create the final image. The ones that are included in this tutorial, and a brief description of how each one will be used, are listed below – the ‘before’ version on the left, the ‘after’ version on the right. Each of these files can be downloaded after you subscribe.

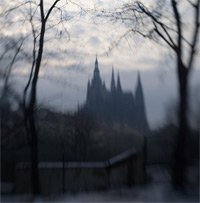
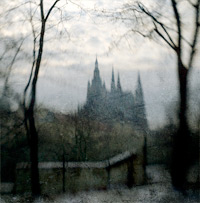
How to get from this … to this
Image 1
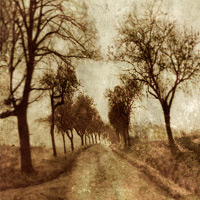
In this first example I will show you how to use the Soft Light blend mode to add a textured overlay to your image.
Image 2
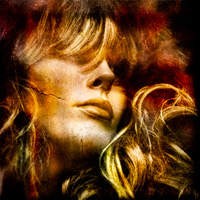
In this example we will discuss a variety of techniques that can be used to add both texture and aesthetic appeal to an image, including using the Overlay and Multiply blend modes, distorting the content of an image, and painting texture onto a new layer.
Image 3
In this example I will show you how to selectively modify the content of an image using a texture: based on both the nature of the texture and the original image to which it is applied.
Image 4
In this final example I will show you how to use a texture as both an overlay and background: an especially useful technique that can be used to isolate a foreground element from an otherwise distracting background.
What our subscribers have said about this tutorial

"Excellent! I was waiting for this and I'm not disappointed!! Fascinating examples. I would write more, but I'm off out to shoot some walls 'n' such :-)"

Jeremy

"Great tutorial, as usual. People like you, Chris Orwig, David Duchemin and Joe McNally just have this genius of explaining complex, seemingly abstract concepts simple enough for simple minds like mine to comprehend."

Tim

"Absolutely superb David and just like the others, something I've been waiting for. As always, clearly and concisely explained with excellent images as examples. Thanks for sharing your expertise with us all :-)"

Roger

"I truly enjoyed this. This one an especially because (like the HDR tutorial) this is a technique that I've never attempted, but this has opened up an entire new realm of possibility. I'm excited to practice this. Thanks for your commitment to excellence Dave. It is greatly appreciated."

Brooks

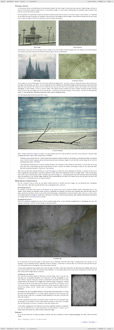
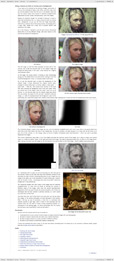
Content overview (the rollover graphics and embedded videos are not illustrated)
page 1 page 2 page 3 page 4 page 5 page 6
How to subscribe
Further information

To find out more about our other individual tutorials please click any of the following images. Alternatively, you can visit our main tutorials page for further information on: our annual subscriptions; our forthcoming issues; and our current members’s offer. You can also read through our sample tutorial on Tonal Range and the Curves tool.

Mini-PSDs
We introduced our Mini-PSDs in February 2010, and release a new image every week. Click here to see the full list of Mini-PSDs and find out more about this feature.
Critique Slot Screencasts
Our Critique Slot Screencasts provide our members with an exciting opportunity to get detailed and constructive feedback on one of their own images, gain an insight into how other members postprocess their images, and see how I might have processed that particular image. Click here to find out more.

David J. Nightingale © 2003–18 • all rights reserved

↓ David
+44 7591 464344
Contact on Skype
Follow on Facebook
  View David Nightingale's LinkedIn profile David's profile on LinkedIn
  View David's Google+ profile David's Google+ profile
David's photoblog feed
↓ Libby
  View David Nightingale's LinkedIn profile Libby's profile on LinkedIn
↓ Get the Latest News
Our blog (summary feed)
Our blog (full feed)
Student gallery feed
software links

Our annual subscribers and lifetime members can obtain a 15% discount on any of the Topaz Labs Photoshop plugins or plugin bundles.

Our annual subscribers and lifetime members can obtain a 15% discount on Photomatix Pro.
training partners


Included above are links to a number of our training partners that we unreservedly recommend.

HomeOnline tutorials17 comments 
Working with textures: part one (further information)