|
|


| previous | latest entry | next |
Title • repose
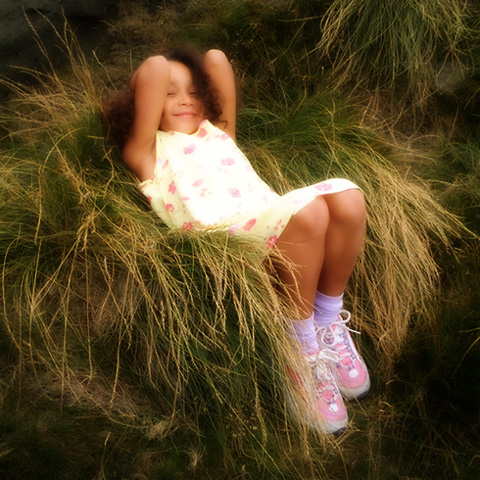
This image, which was taken on the same trip as my previous entry, was constructed using a broadly similar approach; i.e. creating a new layer using the main image, Gaussian blurring this image by eight pixels, then setting the blend mode to Overlay. The Overlay mode seems to increase the contrast within an image by lightening the light areas and darkening others. Mid-tones seem relatively unaffected.
With this image, my major problem was preventing our daughter’s dress from losing all detail; i.e. it was fairly high-key to start with and, in some earlier attempts, tended to lose all detail, including the small pink flowers. Unlike my previous image I didn’t change the colour balance quite so radically, other than to desaturate it slightly. I did try matching the overall effect to the previous image but it wasn’t effective in this instance.
In an attempt to improve my digital imaging skills I recently bought a copy of Adobe Photoshop 7.0 for Photographers by Martin Evening. I looked up Blending Modes, and found that he describes the Overlay mode as one method of superimposing an image on top of another:
Overlay blending mode is usually the most effective, superimposing the blend image on the base (multiplying or screening the colors depending on the base color) whilst preserving the highlights and shadows of the base color. Blending with 50% gray has no effect (p. 291).
Screen and Multiply blend modes are described as follows:
[screen blend mode] multiplies the inverse of the blend and base pixel values together, always making a lighter color, except where the blend color is black.The effect is similar to printing with two negatives sandwiched together in the enlarger (p. 290).
[multiply blend mode] multiplies the base by the blend pixel values, always producing a darker color, except where the blend color is white.The effect is similar to viewing two transparency slides sandwiched together on a lightbox (p. 289).
So, in short, the light bits get lighter and the dark bits get darker. I can’t pretend that I really understand quite how Gaussian blurring the Overlay blended layer creates the ethereal, diffuse effect, but it does seem reasonably effective for this sort of picture. That said, while I do like this image I’m not as pleased with it as my previous attempt, mostly, I think, because the effect I used is less subtely controlled in this effort.
|
|
| previous | latest entry | next |
about us |
training |
blog |
|||


